%20-%20DONKERGROEN%20(2).png)
Helpdesk
Request service
Language
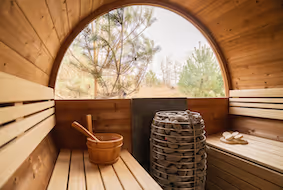
How do you install the interior in the self-build sauna with a wooden back wall or half a panorama?
These steps describe the installation of the interior with the basic equipment for a sauna with a closed back wall or half a panoramic wall.
- Confirm Base Bench Carrier:
- Screw the base bench support to the wall with three 4.5x60 screws.
- The bottom of the carrier lies approximately 55 cm from the middle full moon profile.
- Positioning a Bench on the Carrier:
- Place the bench on the carrier.
- Confirm Bench Leg:
- Secure the leg from behind the bench with two 4x20 screws.
- Bench Support:
- Screw two blocks against the crescent profile to support the bench and create strength.
- Place Carriers for a Large Bench:
- Screw two carriers into the inside of the front and rear walls.
- The bottom of the supports is approximately 55 cm from the lower middle full moon profile.
- Positioning and Attaching Large Bench:
- Place the large bench on the two supports.
- Screw five cubes to the moon profile so that the top of these cubes support the bench.
- Repeat Steps 1 to 6 for the Other Side of the Sauna:
- Follow the same steps to install the base bench and the large bench on the other side of the sauna.
A detailed step-by-step explanation can be found in our manual.